How to Obtain Police Clearance : Visa Applications
Police clearances are documents provided by law enforcement agencies that certify an individual’s criminal history.It may also be referred to as a police check or a good conduct certificate.When applying for a visa, this document is often required.Applicants can use it as a character reference and expedite the visa application process.
We will provide a complete guide on how to secure a police clearance for your visa application in this blog.
What is a Police Clearance?
Police clearances are official records from the police department that confirm a person’s criminal history. For visa applications, this clearance proves the applicant’s good character and compliance status, which many nations require as part of their immigration procedures.
Who Needs a Police Clearance?
There may be varying police clearance requirements for different visa categories:
- Work Visa: To ensure a candidate has no criminal history, employers usually request a police clearance.
- Student Visa: Many educational institutions require this document as proof that the applicant is of good moral character.
- Tourist Visa: Many countries require police clearance for visa applications, particularly for long-term stays.
How a Police Clearance Certificate Helps You Apply for a Visa
The police clearance certificate is used by visa authorities to:
- Check your criminal history: Find out whether you have ever been convicted of a crime.
- Ensure Security: Determine whether you pose a security risk.
- Determine Suitability: Determine whether you are eligible for entry into the country.
Requirements
Who must submit a police clearance certificate?
In order to apply for a green card from abroad, a family member must submit a photocopy of their police clearance certificate to the National Visa Center (NVC) and bring the original or certified copy to the interview. In place of a police clearance certificate, family members applying for a green card from within the United States must submit police records.
The following countries (except the US) require you to submit a police clearance certificate if you’re at least 16 years old:
- If you’ve lived there for at least six months at any point in your life, your country of nationality
- Having lived for at least six months in your country of residence if it is different from your country of nationality
- Having lived in any country for at least 12 months and being at least 16 years of age
Moreover, you must submit a police clearance certificate from any city in the world (except the United States) where you were arrested for any reason, at any age, and regardless of how long you lived there.
Steps to Obtain Police Clearance for Visa Application
Follow these steps to obtain a police clearance certificate for a visa application:
Step 1: Check Specific Requirements
There may be differences between embassies when it comes to police clearance requirements. Check the specific requirements of the consulate or embassy where you plan to apply. Documents commonly required include:
- Identification card that is valid
- Application form completed
- A recent passport-sized photo
Step 2: Gather all necessary documents
Ensure that the application process runs smoothly by collecting the following items:
- Identification: Passports and driver’s licenses are government-issued identification.
- Application Form: This form can be obtained at your local police station or downloaded from the Philippine National Police’s website.
- Photographs: Take 2-3 recent passport-sized photographs that meet the specified requirements (e.g., white background).
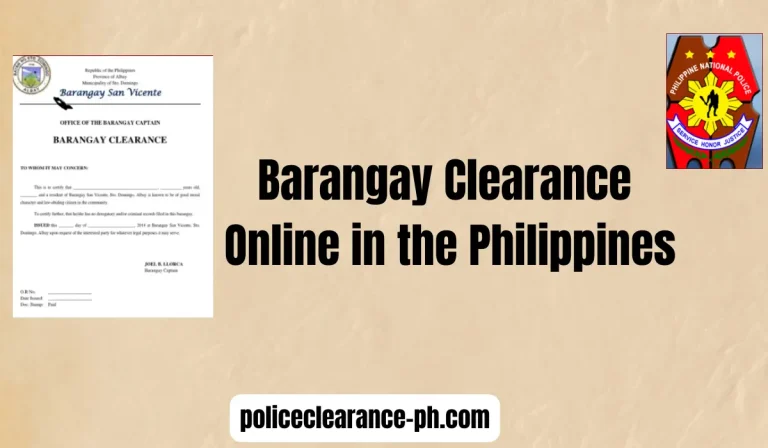
- Verification of Residency: You may be required to provide a barangay clearance or utility bill to verify your residence.
Step 3: Visit Your Local Police Station
Please visit your nearest police station or a police clearance processing center. To find the most convenient location, check out your options online. Some cities offer specialized facilities, so verify your options online.
Step 4: Submit your application
Complete the application form with the correct personal information. To prevent delays, double-check that all information matches your identification.
Step 5: Pay the Required Fee
You will need to pay a fee once your application has been submitted. Depending on the location, the cost may vary, so be sure to confirm the exact amount and save the payment receipt.
Step 6: Provide Biometric Information
As soon as your payment is confirmed, you will be required to provide biometric data, such as:
- The fingerprint
- Photo taken digitally
During this process, police personnel will assist you, which is crucial to your clearance application.
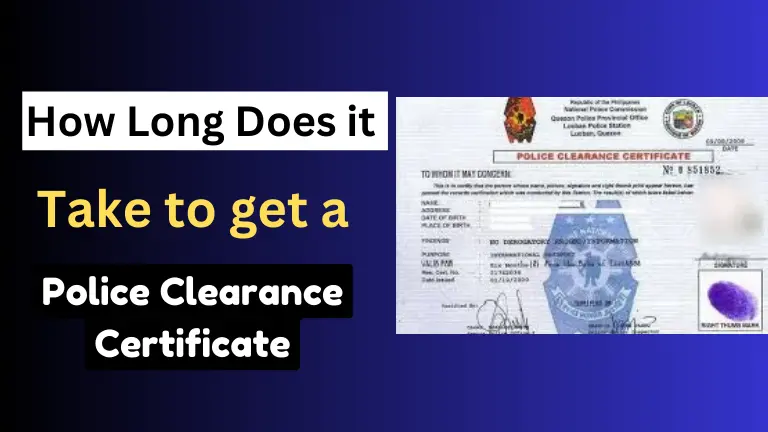
Step 7: Wait for processing
Depending on the location and demand, processing times may vary. The clearance usually takes between a few hours and a few days to complete. Depending on the station, expedited services may be available for an additional fee.
Step 8: Collect Your Police Clearance
Once your police clearance is ready, return to the police station or processing center. Bring your valid ID and payment receipt. Verify that all details on the clearance are accurate.
Step 9: Include the Clearance in Your Visa Application
Attach your police clearance to your visa application along with other required documents. Follow the specific guidelines of the embassy or consulate when submitting your application.
Tips for a Smooth Application Process
- Early Application: Prepare well in advance of the day you plan to travel to avoid delays.
- You can check online: Many local police stations offer online application processing. Online appointment times and forms can be found here.
- Keep Copies: Copies of your police clearance certificate and any other documents you may need. In the event that any documents go missing, this can be useful.
- Verify with the Embassy: Be sure to confirm the requirements with the embassy or consulate of the country you are applying to, since regulations may change.
FAQs
Conclusion
Obtaining a police clearance certificate is an important step in the visa application process. You can ensure a smooth and fast application process by following the instructions outlined in this blog and understanding the requirements. Preventing last-minute hassles by beginning the application process well in advance is advised.